Doughs:
Fillings:
Sauces:
MAKE THE DOUGH AND FILLING
Make your dough and filling of choice. Let the dough rest, tightly covered, at room temperature for 30 minutes. Transfer your filling to a piping bag and let it chill as needed.
SET UP YOUR WORKSPACE
Dust a sheet pan with semolina or line it with a dishcloth. Gather your tools and set up your pasta machine.
SHEET AND TRIM THE DOUGH
Roll a quarter of your pasta dough into a sheet, stopping at setting 7 for a Marcato or twice through setting 7 for a KitchenAid machine.
Lay the pasta sheet horizontally on your work surface (if you’re using a countertop, dust it with some 00 or all-purpose flour first).
Trim away the uneven ends and cut the sheet into sections to fit your work surface, covering any dough you’re not immediately using with a damp dishcloth. Any scraps can be balled up, covered, and reused later if they’re still pliable, or saved for soup.
To make agnolotti
FILL THE PASTA
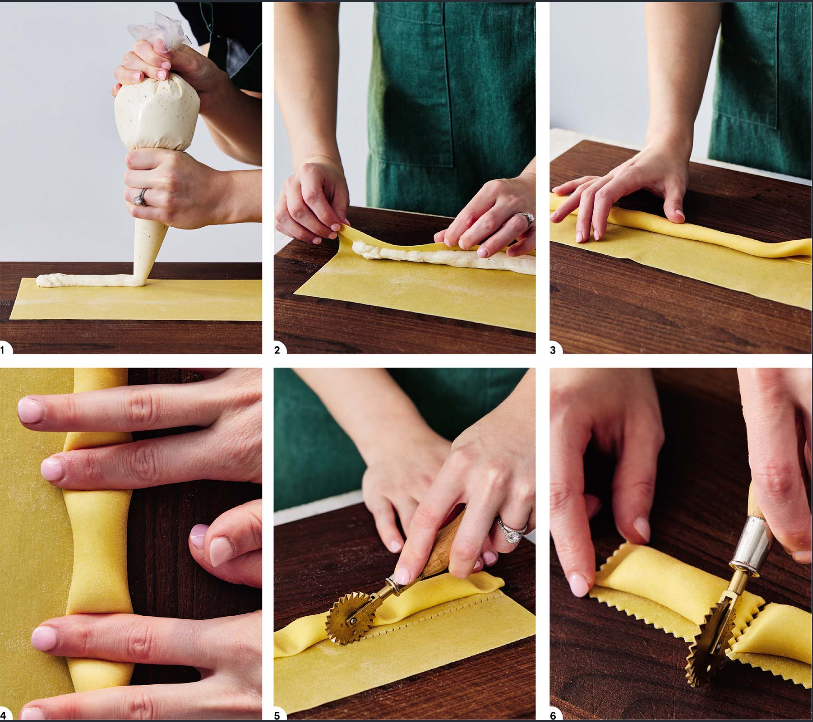
Pipe a long cylinder of filling, as thick as your thumb, along the pasta sheet, starting about ½ inch (1.25 cm) above the bottom edge and leaving 1-inch (2.5-cm) gaps at either end. If it looks scant, pipe another layer of filling on top. SEAL THE PASTA If the dough feels dry, mist it with a spray bottle or trace a small amount of water with your finger around the top edge of the filling.
Starting at one of the bottom corners, lift and roll the dough up and over the filling, away from you, so it’s completely encased. Use the side of an index finger to seal the seam where the layers of dough meet, pushing the filling back toward you so it’s as taut as possible. Roll the encased filling over once more so the seam disappears and you’re left with a tight tube.
FORM AND CUT THE AGNOLOTTI
Now for my favorite part: With your index fingers held 2 inches (5 cm) apart, firmly and confidently press them down along the length of the tube to create individual pillows.
Using a fluted pasta cutter or pasta wheel, trim the excess dough, close to the filling but leaving a small amount of overhang. You can make more agnolotti out of the trimming.
Gently lift the pasta to make sure it’s not sticking to your work surface, then use the cutter to slice between the filling pockets and form the individual agnolotti.
To make agnolotti del plin
FILL THE PASTA
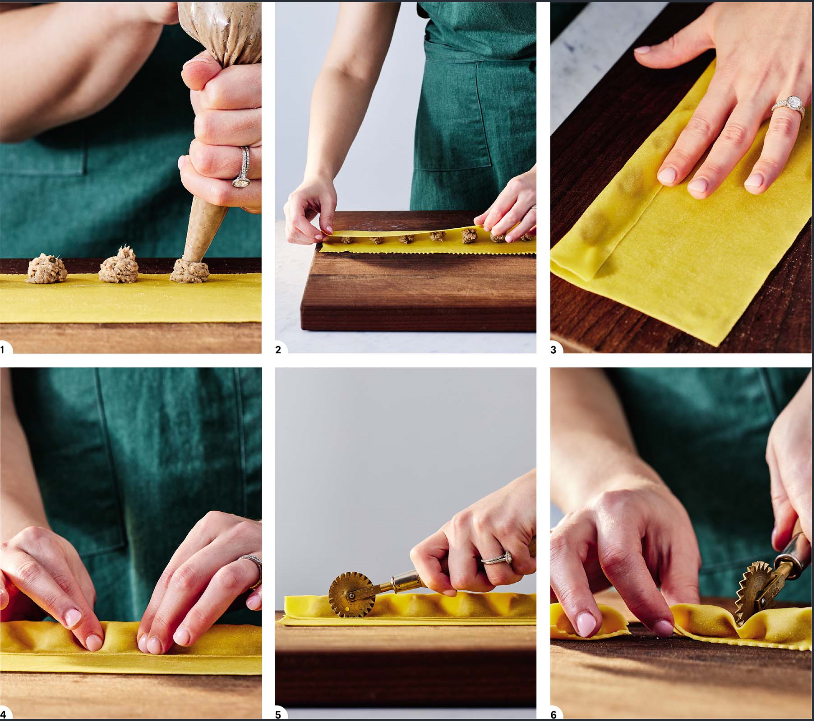
Pipe ½-teaspoon dollops of filling along the pasta sheet, starting about ¼ inch (6 mm) above the bottom edge and leaving ¾-inch (2-cm) gaps between them.
SEAL THE PASTA
If the dough feels dry, mist it with a spray bottle or trace a small amount of water with your finger around the top edge of the filling. Starting at one of the bottom corners, lift and fold the dough up and over the filling, away from you, so it’s completely encased. Use the side of a finger to seal the seam where the layers of dough meet, pushing the filling back toward you so it’s as taut as possible.
PINCH AND CUT THE AGNOLOTTI
Now for the big moment: With your thumbs and index fingers, firmly and confidently pinch the gaps between the filling dollops upward so they stand tall. Using a fluted pasta cutter or pasta wheel, trim the excess dough, close to the filling but leaving a small amount of overhang. You can make more plin out of the trimming.
Gently lift the pasta to make sure it’s not sticking to your work surface. Finally, use the fluted cutter to forcefully cut forward between each filling pocket—smack in the middle of the pinches—to form the individual plin and signature wrinkles on each side.
Arrange the finished pasta in a single layer on the prepared sheet pan. Repeat with the remaining dough and filling.
COOK THE PASTA
Cook the agnolotti until tender, 2½ to 3 minutes.